Configuring Hardware Resource Settings
You can configure and allocate expansion card resources for different software QTS applications in Hardware Resource Settings. You can also configure Thunderbolt expansion cards, TPU modules, or network expansion cards that support SR-IOV.
For details, see Viewing Single Root I/O Virtualization (SR-IOV) Settings
Configuring TPU Settings
You can configure the priority level and maximum number of Tensor Processing Units (TPU) allocated to an app.
-
The system will not run apps with lower TPU priority levels until the TPU resource is released from running higher priority apps.
-
The maximum number of TPUs you can allocate to an app is 4.
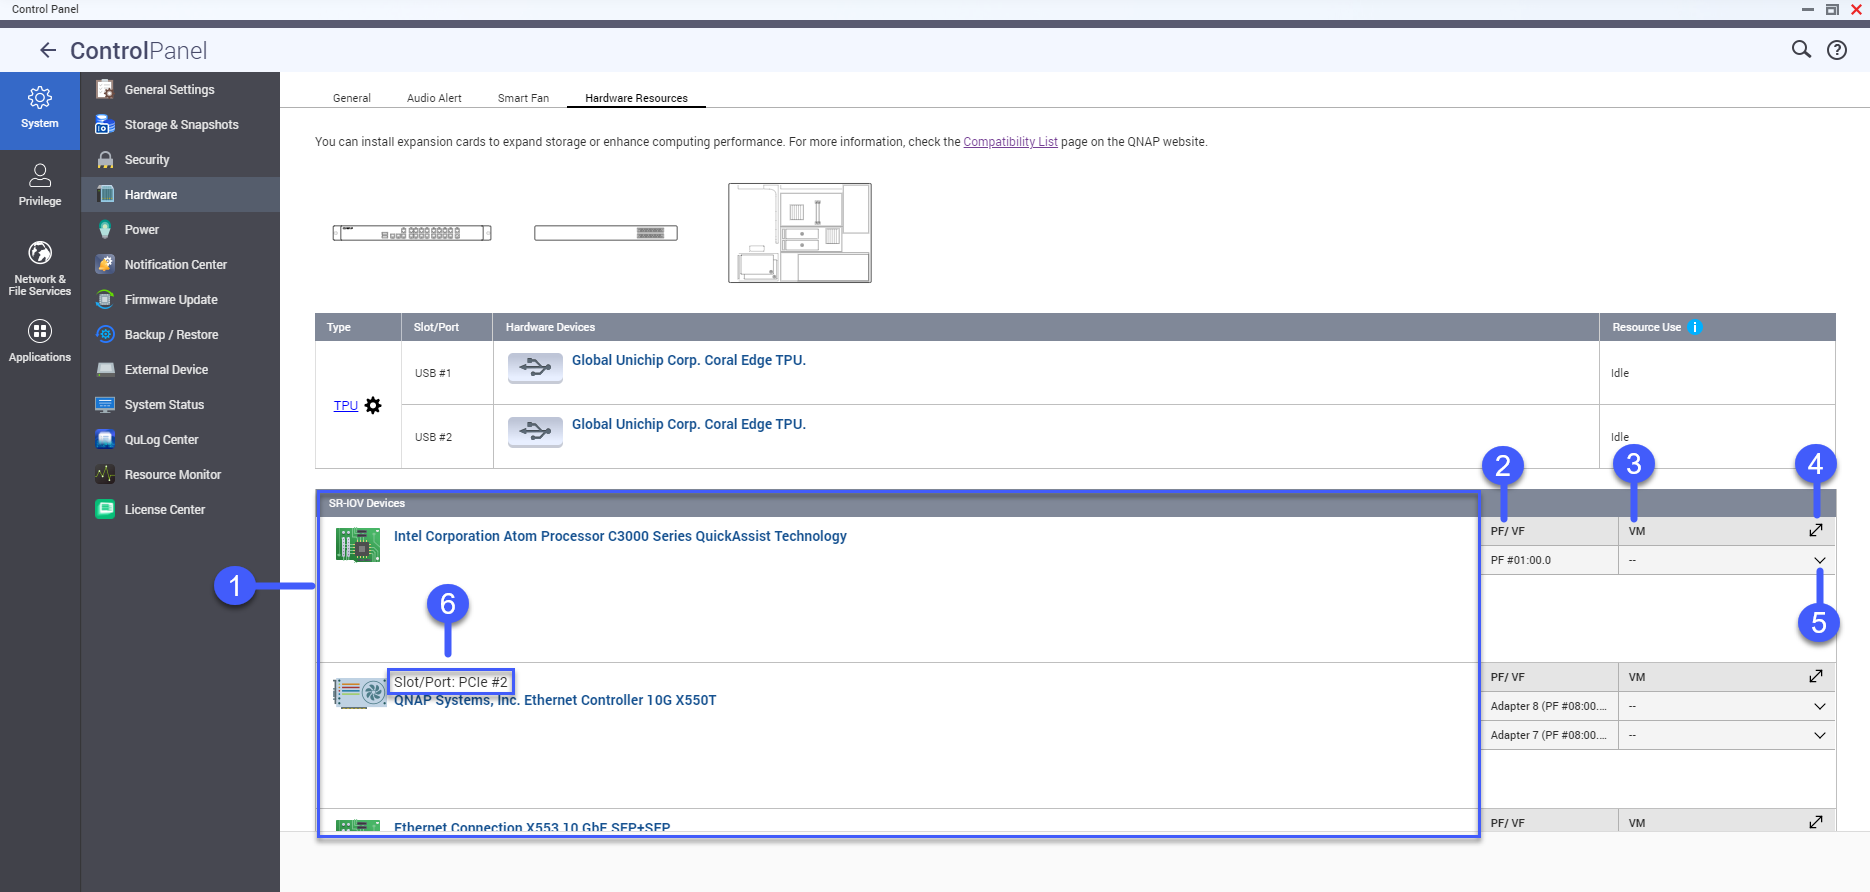
Viewing Single Root I/O Virtualization (SR-IOV) Settings
You can view all Single Root I/O Virtualization (SR-IOV) devices mapped to your virtual machines on the page. The SR-IOV interface is a hardware specification that allows a single PCIe device, such as a network adapter, to appear as multiple physical devices to the hypervisor. Because each device is directly assigned to an instance, it can bypass the hypervisor and virtual switch layer to achieve low latency and performance matching in nonvirtualized environments. SR-IOV achieves this through the following types of functions:
-
Physical Function (PF): These are PCIe devices that have SR-IOV capabilities. PFs are managed and configured in the same way as PCIe devices.
-
Virtual Function (VF): These are lightweight PCIe functions that only process I/O. Because each VF is derived from a PF, the device hardware limits the number of VFs a device can have. A VF shares one or more hardware resources of the device, such as a memory or network port.
The following table lists all SR-IOV functions you can view in Hardware Resource:
|
No. |
Settings |
Description |
|---|---|---|
|
1 |
SR-IOV Devices |
Lists all the SR-IOV devices that are mapped to your virtual machine (VM). |
|
2 |
PF/VF |
Displays the physical function (PF) or virtual function (VF) configured to the SR-IOV device. |
|
3 |
VM |
Shows the virtual machines that are mapped to the PF or VF. |
|
4 |
Resize |
Click |
|
5 |
Show or Hide |
Click |
|
6 |
Slot/Port |
Shows the slot/port type and slot/port number. |
 to enlarge or minimize the
SR-IOV device panel window.
to enlarge or minimize the
SR-IOV device panel window. to show or hide the list of
SR-IOV device details.
to show or hide the list of
SR-IOV device details.For details on how to configure an SR-IOV device to a VM, see the Virtualization Station user guide.