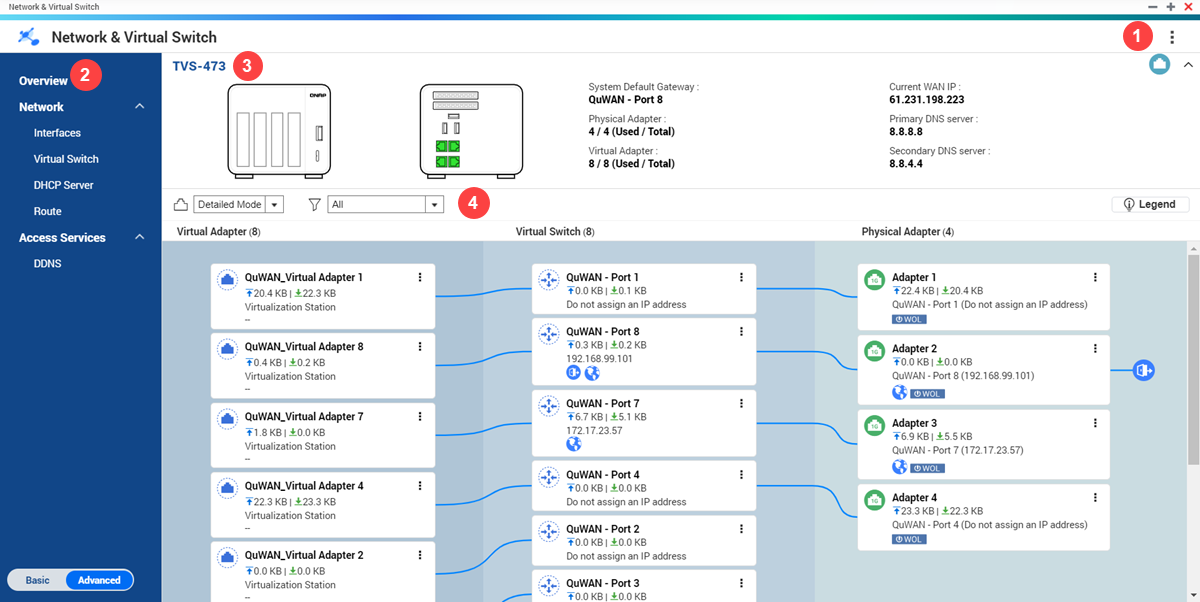
Parts of the User Interface
The Network & Virtual Switch user interface has four main areas.
|
Label |
Area |
Description |
|---|---|---|
|
1 |
Toolbar |
The toolbar displays the following buttons:
|
|
2 |
Menu |
Network & Virtual Switch features two separate usage modes in the menu pane. Switch between these modes by clicking Basic or Advanced.
|
|
3 |
Main panel |
The main panel displays the device network information. You can perform the following tasks on the main panel.
|
|
4 |
Network topology |
The network topology provides a visual representation of the connected physical and virtual network adapters. You can perform the following tasks on the network topology panel.
|
 : Click to view the MAC address
of the network adapters.
: Click to view the MAC address
of the network adapters. : Click to collapse the main
panel.
: Click to collapse the main
panel. to view the topology in simple
or detailed mode.
to view the topology in simple
or detailed mode. to filter and view specific
network topology components.
to filter and view specific
network topology components. and select one of the
following.
and select one of the
following.