|
HybridDesk Station |

|

|
|
|
|
HybridDesk Station |

|

|
|
HybridDesk Station
|
HybridDesk Station |
|
|
|
|
|
HybridDesk Station |
|
|
|
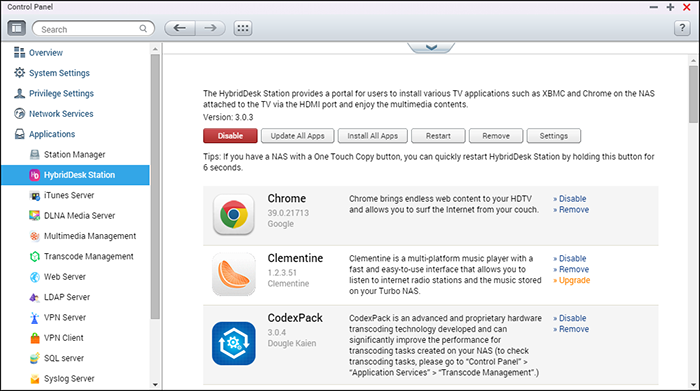
HybridDesk Station is a platform where numerous home and office apps can be installed to enhance your entertainment and productivity needs.
This chapter covers the following topics:
Note: The HybridDesk Station is currently supported by the following models:
|
Create your lovely media environment by following these steps:
| 1. | Setting up the environment of the HybridDesk Station: Connect the NAS to the HDMI TV with a HDMI cable |
| o | Remote controller: There are 4 different ways to control the HybridDesk Station. |
| ▪ | QNAP remote controller |
| ▪ | MCE remote controller |
| ▪ | USB keyboard or mouse |
| ▪ | Qremote: QNAP remote app, designed exclusively for the HybridDesk Station. |
Note: If you want to use Chrome, you must use the Qremote mouse function or use a USB mouse that is connected to the NAS. |
| 2. | Installing the HybridDesk Station |
| o | Go to "Applications" > "HybridDesk Station" and click the "Get Started Now" button. The system will automatically install the HybridDesk Station. |
| 3. | Choosing the applications to install |
| o | HybridDesk Station: The HybridDesk Station portal, which allows you to use the following applications on the TV screen. |
| o | XBMC: An application for you to operate and enjoy your multimedia data on the TV screen. |
| o | Chrome: With the help of Chrome, the NAS brings endless web content to your HDTV. Just sit back, relax, and surf the Internet on your couch. |
| o | YouTube: Browse and click to enjoy millions of YouTube videos on your TV. |
| o | My NAS: Enter the local NAS administration web page to view the NAS functions and settings. |
| o | Surveillance Station (Local Display): An application that allows NAS devices to output high-resolution video from IP cameras. |
Note:
|
After installation, choose your preferred language on the TV screen. Then, you will see the HybridDesk Station portal as shown here.

| 4. | Enjoying the HybridDesk Station: At the HybridDesk Station portal, simply choose the application you want to use to start enjoying the service. |
Enjoy the comfort of your living room and play movies, photos, and music directly on your TV by XBMC or other applications.
Taking Pictures with Smart Phone and Watching them on TV
The first part is done by Qfile on your phone:
| 1. | Use Qfile to browse your NAS. |
| 2. | Choose the multimedia shared folder. |
| 3. | Select the upload function. |
| 4. | Take a picture and upload it to the NAS. |
The second part is performed by the HybridDesk Station on your TV:
| 5. | Turn on your TV and choose Kodi. |
| 6. | Choose "Pictures". |
| 7. | Select the "Multimedia" folder. |
| 8. | Double click the picture you just uploaded. |
Viewing Photos on your USB Device or Camera
Steps:
| 1. | Connect a USB device or camera to the NAS. |
| 2. | Choose "Pictures". |
| 3. | Choose "USBDisk". |
| 4. | Select the photo you want to view. |
Importing Media Contents to your NAS
Use one of the several types of network protocols (Samba, AFP, FTP, and NFS) to save the media content files in the "Multimedia" or "Qmultimedia" shared folder, or copy them from an external USB or eSATA device.
To browse media contents of different folders than the default "Multimedia" shared folder, perform the following steps:
| 1. | Choose "Files" under "Videos". |
| 2. | Choose "Add Videos". |
| 3. | Click "Browse". |
| 4. | Choose "Root filesystem". |
| 5. | Choose "share". |
| 6. | For example, if you want to add the "Download" shared folder, choose "Download". Otherwise, just choose the shared folder you would like to add as a video source. |
| 7. | Click "OK" to add this source. |
| 8. | You will see the "Download" shared folder in the list. |
Note:
|
Chrome
Select the Chrome application at the main page of HybridDesk Station. You can surf the web like using a web browser on your PC.
Note: If you want to use Chrome, you must use the Qremote mouse function or use a USB mouse that is connected to the NAS. |
Surveillance Station (Local Display)
Monitor IP cameras and playback recordings stored on the NAS.
YouTube
Enjoy videos on YouTube via HybridDesk Station.
MyNAS
Enter the local NAS administration web page to view the NAS functions and settings.
Configuring HybridDesk Station
Configure the HybridDesk Station by choosing "Settings" at the HybridDesk Station portal and HybridDesk Station in QTS.
| • | HybridDesk Station portal: |
| o | App: Applications can be enabled or disabled here. |
| o | Display: Change the screen resolution and set up to turn off the screen after an amount of idle time. |
| o | Preferences: Here you may change the language or type of remote control and audio output. The default setting is HDMI. If there is an installed USB sound card, you can choose that option in the NAS Audio Output. |
| • | HybridDesk Station in QTS: |
| o | Output resolution: Change the resolution for the HybridDesk Station portal screen. Before you change this setting, please make sure that no apps are opened in the HybridDesk Station portal. |
| o | Overscan: This setting can reduce the visible area of a video displayed on the HybridDesk Station portal. The higher the percentage, the more the visible area will be reduced. |
Note:
|


RM-IR001 |
RM-IR002 |
MCE |
XBMC |
HD Station |
|||||
Power |
Power |
1 |
N/A |
Power |
1 |
Power |
1 |
Power menu |
|
|
Mute |
2 |
OK |
Mute |
12 |
Mute |
13 |
Mute |
|
Number |
0,1,2,3,4,5,6,7,8,9 |
3 |
OK |
|
|
0,1,2,3,4,5,6,7,8,9 |
18 |
0,1,2,3,4,5,6,7,8,9 |
|
|
Vol+, Vol- |
4 |
OK |
Vol+, Vol- |
9 |
Vol+, Vol- |
12 |
Vol+, Vol- |
|
|
List/ Icon |
5 |
N/A |
|
|
|
|
View mode |
|
|
Search |
6 |
N/A |
|
|
|
|
|
|
|
TV Out |
8 |
N/A |
|
|
|
|
|
|
|
Settings |
7 |
N/A |
|
|
|
|
Settings |
|
Shortcut |
Red - (Home) |
9 |
OK |
|
|
Red - (Home) |
3 |
Home |
|
|
Green (Video) |
10 |
OK |
|
|
Green (Video) |
4 |
Video menu |
|
|
Yellow (Music) |
11 |
OK |
|
|
Yellow (Music) |
22 |
Music menu |
|
|
Blue (Picture) |
12 |
OK |
|
|
Blue (Picture) |
23 |
Photo menu |
|
Video Menu |
Bookmark |
13 |
N/A |
|
|
|
|
Favorite |
|
|
Repeater |
14 |
N/A |
|
|
|
|
Repeater |
|
|
Guide |
16 |
N/A |
|
|
|
|
Help |
|
|
Record |
15 |
N/A |
|
|
|
|
|
|
|
CH- |
17 |
Previous |
|
|
Previous |
32 |
Skip back |
|
|
CH+ |
18 |
Next |
|
|
Next |
33 |
Skip forward |
|
|
Go to |
20 |
N/A |
|
|
|
|
Video progress bar |
|
|
Info |
19 |
OK |
Info |
10 |
Info |
10 |
File info |
|
Play Control |
Home |
21 |
OK |
Home |
7 |
|
|
Home menu |
|
|
Resume |
22 |
N/A |
|
|
|
|
Now playing |
|
|
Return |
28 |
OK |
Return |
11 |
Back |
7 |
Back |
|
|
Options |
29 |
N/A |
Menu |
8 |
More |
|
Playback menu |
|
|
OK |
25 |
OK |
OK |
3 |
OK |
7 |
OK |
OK |
|
Up |
23 |
OK |
Up |
2 |
Up |
7 |
Up |
Up |
|
Down |
26 |
OK |
Down |
5 |
Down |
7 |
Down |
Down |
|
Right |
27 |
OK |
Right |
6 |
Right |
7 |
Right |
Right |
|
Left |
24 |
OK |
Left |
4 |
Left |
7 |
Left |
Left |
Video Play |
Move backward |
30 |
OK |
|
|
Move backward |
16 |
Move backward |
|
|
Move forward |
31 |
OK |
|
|
Move forward |
31 |
Move forward |
|
|
Play |
32 |
OK |
|
|
Play |
15 |
Play |
|
|
Slow |
33 |
N/A |
|
|
|
|
Slow |
|
|
Pause |
34 |
OK |
|
|
Pause |
30 |
Pause |
|
|
Stop |
35 |
OK |
|
|
Stop |
33 |
Stop |
|
Video Setting |
Audio |
36 |
Audio List |
|
|
|
|
Language track |
|
|
Top/ Menu |
37 |
Video List |
|
|
|
|
Movie menu |
|
|
Subtitle |
38 |
OK |
|
|
Subtitle |
2 |
Subtitle track |
|
|
Zoom |
39 |
N/A |
|
|
|
|
Zoom |
|
|
Pop up |
40 |
N/A |
|
|
|
|
Movie menu |
|
|
Angle |
41 |
N/A |
|
|
|
|
Angle |
|
Input |
|
|
|
|
|
Clear (N/A) |
19 |
Clear |
|
|
OK |
|
|
|
|
Enter |
34 |
Confirm |
|
|
|
|
|
|
|
Switch 16:9 / 4:3 |
27 |
|
|
Additional Reference: |
|
© 2017 QNAP Systems, Inc. |
|