|
Shared Folders |

|

|
|
|
|
Shared Folders |

|

|
|
Shared Folders
|
Shared Folders |
|
|
|
|
|
Shared Folders |
|
|
|
Go to "Control Panel" > "Privilege Settings" > "Shared Folders" to configure shared folders of your NAS.
This chapter covers the following topics:
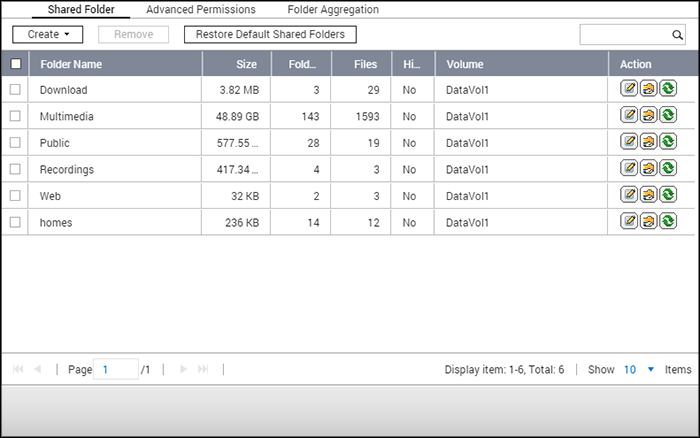
You can create multiple shared folders on the NAS and specify the access rights of the users and user groups to the shares. The number of shared folders you can create on the NAS varies according to the NAS models. If your NAS model is not listed, please visit http://www.qnap.com for details.
Maximum number of shared folders |
NAS models |
256 |
TS-110, TS-210, TS-112, TS-119, TS-119P+, TS-212, TS-219P+, TS-x20, TS-x21, TS-410, TS-239 Pro II+, TS-259 Pro+ |
512 |
TS-412, TS-419P+, TS-410U, TS-419U, TS-412U, TS-419U+, SS-439 Pro, SS-839 Pro, TS-439 Pro II+, TS-459U-RP/SP, TS-459U-RP+/SP+, TS-459 Pro+, TS-459 Pro II, TS-559 Pro+, TS-559 Pro II, TS-659 Pro+, TS-659 Pro II, TS-859 Pro+, TS-859U-RP, TS-859U-RP+, TS-809 Pro, TS-809U-RP, TS-x70, TS-879 Pro, TS-1079 Pro, TS-879U-RP, TS-EC879U-RP, TS-1279U-RP, TS-EC1279U-RP, TVS-471, TVS-671, TVS-871, TVS-871U-RP, TVS-1271U-RP, TVS-463, TVS-663, TVS-863, TVS-863+. |
To create a shared folder, follow the steps below:
| 1. | Click "Create" > "Shared Folder". |
| 2. | Enter the basic folder settings. |
| o | Folder name: Enter the share name. The share name does not support " / \ [ ] : ; | = , + * ? < > ` ' |
| o | Comment: Enter an optional description of the shared folder. |
| o | Disk Volume: Select which disk volume on which to create the folder. |
| o | Path: Specify the path of the shared folder or select to let the NAS specify the path automatically. |
| 3. | Access privileges for users: Select the way you want to specify access rights to the folder. If you select to specify the access rights by user or user group, you can select to grant read only, read/write, or deny access to the users or user groups. |
| 4. | Folder Encryption: Select to enable folder encryption with 256-bit AES encryption. See Folder Encryption for more information. |
| 5. | Advanced settings (this is only available when creating a shared folder) |
| o | Guest Access Right: Assign guest access rights of the folder. |
| o | Media Folder: Select to set the shared folder as a media folder. |
| o | Hidden Folder Hide Network drive: Select to hide the shared folder or not in Microsoft Networking. When a shared folder is hidden, you have to enter the complete directory \\NAS_IP\share_name to access the share. |
| o | Lock File (Oplocks): Opportunistic locking is a Windows mechanism for the client to place an opportunistic lock (oplock) on a file residing on a server in order to cache the data locally for improved performance. Oplocks is enabled by default for everyday usage and should be disabled on networks that require multiple users concurrently accessing the same files. |
| o | SMB Encryption: Set the folder to be accessible for SMB 3 clients. This option is only available after SMB3 is enabled. After it is enabled, all communications via Microsoft Networking will be conducted via SMB3 and encrypted. All SMB3 clients will be able to connect to NAS via Microsoft Networking. |
| o | Recycle Bin: Enable the Network Recycle Bin for created shared folders. "Restrict the access of Recycle Bin to administrators only for now" will ensure that files deleted and moved to the Network Recycle Bin can only be recovered by administrators. Please note that the Recycle Bin option is only available after you enable Network Recycle Bin in "Control Panel" > "Network Services" > "Network Recycle Bin". |
| o | Enable Sync on this shared folder: Enable this option if you want to sync the contents in this shared folder. Refer to Qsync Central Station for more details. |
| 6. | Click "create" to complete the setup. |
To delete a shared folder, select the folder checkbox and click "Remove". You can select the option "Also delete the data. (Mounted ISO image files will not be deleted)" to delete the folder and the files in it. If you do not select to delete the folder data, the data will be retained in the NAS. You can create a shared folder of the same name again to access the data.
Icon |
Name |
Description |
|
Folder Property |
Edit the folder property. Select to hide or show the network drive, enable or disable oplocks, folder path, comment, restrict the access of Recycle Bin to administrators (files can only be recovered by administrators from the Network Recycle Bin) ,enable or disable write-only access on FTP connection, folder encryption, and synchronization. |
|
Folder Permissions |
Edit folder permissions and subfolder permissions. |
|
Refresh |
Refresh the shared folder details. |
Tip: In the event that default shared folders are removed due to human error (such as accidental hard drive removal), you can attempt to restore them using the "Restore Default Shared Folders" button once the errors have been fixed. |
Folder Permissions
Configure folder and subfolder permissions on the NAS. To edit basic folder permissions, locate a folder name in "Privilege Settings" > "Shared Folders" and click "Folder Permissions". The folder name will be shown on the left and the users with configured access rights are shown in the panel. You can also specify guest access rights on the bottom of the panel. Click "Add" to select more users and user groups and specify their access rights to the folder. Click "Add" to confirm. Click "Remove" to remove any configured permissions. You can select multiple items by holding the Ctrl key and left clicking the mouse. Click "Apply" to save the settings.
Subfolder Permissions
The NAS supports subfolder permissions for secure management of the folders and subfolders. You can specify read, read/write, and deny access of individual user to each folder and subfolder.
To configure subfolder permissions, follow the steps below:
| 1. | Go to "Privilege Settings" > "Shared Folders" > "Advanced Permissions" tab. Select "Enable Advanced Folder Permissions" and click "Apply". |
| 2. | Go to "Privilege Settings" > "Shared Folders" > "Shared Folder" tab. Select a root folder, for example Dept, and click "Folder Permissions". The shared folder name and its first-level subfolders are shown on the left. The users with configured access rights are shown in the panel, with special permission below. Double click the first-level subfolders to view the second-level subfolders. Select the root folder (Dept). Click "+ Add" to specify read only, read/write, or deny access for the users and user groups. |
| 3. | Click "Add" when you have finished the settings. |
| 4. | Specify other permissions settings below the folder permissions panel. |
| o | Guest Access Right: Specify to grant full or read only access or deny guest access. |
| o | Owner: Specify the owner of the folder. By default, the folder owner is the creator. |
| 5. | To change the folder owner, click the "Folder Property" button next to the owner field. |

| 6. | Select a user from the list or search a username. Then click "Set". |
| o | Only the owner can delete the contents: When you apply this option to a folder, e.g. Dept, only the folder owner can delete the first-level subfolders and files. Users who are not the owner but possess read/write permission to the folder cannot delete the folders Admin, HR, Production, Sales, and test in this example. This option does not apply to the subfolders of the selected folder even if the options "Apply changes to files and subfolders" and "Apply and replace all existing permissions of this folder, files, and subfolders" are selected. |
| o | Only admin can create files and folders: This option is only available for root folders. Select this option to allow admin to create first-level subfolders and files in the selected folder only. For example, in the folder "Dept", only admin can create files and subfolders Admin, HR, Production, and so on. Other users with read/write access to Dept can only create files and folders in the second and lower-level subfolders such as Admin01, Admin02, HR1, and HR2. |
| o | Apply changes to files and subfolders: Apply permissions settings except owner protection and root folder write protection settings to all the files and subfolders within the selected folder. These settings include new users, deleted users, modified permissions, and folder owner. The options "Only the owner can delete the contents" and "Only admin can create files and folders" will not be applied to subfolders. |
| o | Apply and replace all existing permissions of this folder, files, and subfolders: Select this option to override all previously configured permissions of the selected folder and its files and subfolders except owner protection and root folder write protection settings. The options "Only the owner can delete the contents" and "Only admin can create files and folders" will not be applied to subfolders. |
| o | Special Permission: This option is only available for root folders. Select this option and choose between "Read only" or "Read/Write" to allow a user to access to all the contents of a folder irrespectively of the pre-configured permissions. A user with special permission will be identified as "admin" when he/she connects to the folder via Microsoft Networking. If you have granted special permission with "Read/Write" access to the user, the user will have full access and is able to configure the folder permissions on Windows. Note that all the files created by this user belong to "admin". Since "admin" does not have quota limit on the NAS, the number and size of the files created by users with special permission will not be limited by their pre-configured quota settings. This option should be used for administrative and backup tasks only. |
| 7. | After changing the permissions, click "Apply" and then "YES" to confirm. |
Note:
|
Microsoft Networking Host Access Control
NAS folders can be accessed via Samba (Windows) by default. You can specify authorized IP addresses and hosts by following these steps:
| 1. | Click "Folder Permissions". |
| 2. | Select "Microsoft Networking host access" from the drop-down menu on top of the page. |
| 3. | Specify the allowed IP addresses and host names. The following IP address and host name are used as example here: |
| o | IP address: 192.168.12.12 or 192.168.*.* |
| o | Host name: dnsname.domain.local or *.domain.local |
| 4. | click "Add" to enter the IP address and host name and then "Apply". |
Notifications on characters used:
| • | Wildcard characters: You can enter wildcard characters in an IP address or host name entry to represent unknown characters. |
| • | Asterisk (*): Use an asterisk (*) as a substitute for zero or more characters. For example, if you enter *.domain.local, the following items are included: a.domain.local, cde.domain.local, or test.domain.local |
| • | Question mark (?): Use a question mark (?) as a substitute for only one character. For example, test?.domain.local includes the following: test1.domain.local, test2.domain.local, or testa.domain.local |
When you use wildcard characters in a valid host name, dot (.) is included in wildcard characters. For example, when you enter *.example.com, "one.example.com" and "one.two.example.com" are included.
Shared folders on the NAS can be encrypted with 256-bit AES encryption to protect data. The encrypted shared folders can only be mounted for normal read/write access with the authorized password. The encryption feature protects the confidential data of the folder from unauthorized access even if the hard drives or the entire NAS were stolen.
Note:
|
Encrypting and locking a shared folder
To encrypt and lock a shared folder, follow these steps:
| 1. | Enable folder encryption: |
| o | When you create a folder, tick "Encryption" under "Folder Encryption", enter a password and choose to save an encryption key. |
| o | To encrypt an existing folder, click "Edit Properties" under "Action" in "Control Panel" > "Privilege Settings" > "Shared Folders", tick "Encrypt this folder", enter a password and choose to save encryption key. |
| 2. | Go to "Control Panel" > "Privilege Settings" > "Shared Folders", click "Encryption Management" under "Action". |
| 3. | Switch to "Lock" and click "OK". |
Encryption verification
After a folder is locked, that folder will be invisible in File Station. If an encrypted shared folder is unlocked, it will reappear in File Station.
Unlocking a shared folder
To unlock an encrypted and locked shared folder, go to "Control Panel" > "Privilege Settings" > "Shared Folders", click "Encryption Management" under "Action" and enter the password or upload the encryption key file.
Encryption Management
After the folder is encrypted, click "Encryption Management" under "Action" in "Control Panel" > "Privilege Settings" > "Shared Folders" to edit encryption settings:
| • | To save the encryption key, select the "Download" tab and enter the encryption password to export the key. |
| • | You can choose to automatically mount the encrypted folder by selecting "Mount automatically on start up" in the "Save" tab. Enter the encryption key to mount the folder automatically for access. This option will be automatically enabled if the "Save encryption key" is checked when encrypting the folder. Folders that do not have this option enabled will be locked after the system restarts. |
| • | To prevent access to the encrypted folder, enable the lock function in the "Lock" tab. Select "Forget the saved key" if you want the folder to remain locked after the system restarts (i.e., without auto mount when system starts.) To unlock the folder later, click "Unlock Share Folder" and then enter or import the encryption key to unlock the folder. |
Note:
|
You can mount ISO image files on the NAS as ISO shares. The NAS supports mounting up to 256 ISO shares.
TS-110, TS-119, TS-120, TS-121, TS-210, TS-219, TS-219P, TS-220, TS-221, TS-410, , TS-119P+, TS-219P+, TS-112, TS-212 support up to 256 network shares only (including 6 default network shares). The maximum number of ISO image files supported by these models is less than 256 (256 minus 6 default shares minus number of network recycle bin folders).
Follow these steps to mount an ISO file on the NAS using the web interface:
| 1. | Log into the NAS as an administrator. Go to "Share Folders" > "Create". Click "Create an ISO Share". |
| 2. | Select an ISO image file on the NAS. Click "Next". |
| 3. | The image file will be mounted as a shared folder of the NAS. Enter the folder name. |
| 4. | Specify the access rights of NAS users or user groups to the shared folder. You can also select "Deny Access" or "Read only" for the guest access right. Click "Next". |
| 5. | Confirm the settings and click "Next". |
| 6. | Click "Finish". |
| 7. | After mounting the image file, you can specify access rights for users over different network protocols such as SMB, AFP, NFS, and WebDAV by clicking the Access Permission icon in the "Action" column. |
The NAS supports mounting ISO image files using File Station. Refer to the File Station chapter for more details.
Note:
|
You can aggregate the shared folders on Microsoft network as a portal folder on the NAS and let NAS users access the folders through your NAS. Up to 10 folders can be linked to a portal folder. To use this function, follow these steps:
| 1. | Enable folder aggregation. |
| 2. | Click "Create a Portal Folder". |
| 3. | Enter the portal folder name. Select to hide the folder or not, and enter an optional comment for the portal folder. Select the option "User must login before accessing the portal folder" to avoid guest access and permission issues on the shared folders. |
| 4. | Click the "Link Configuration" button under "Action" and enter the remote folder settings. Make sure the folders are open for public access. |
| 5. | Upon successful connection, you can connect to the remote folders through the NAS. |
Note:
|
Advanced Permissions
"Advanced Folder Permissions" and "Windows ACL" provide subfolder and file level permissions control. They can be enabled independently or together.
Protocols |
Permission |
Options |
How to Configure |
Advanced Folder Permissions |
FTP, AFP, File Station, Samba |
3 (Read, Read & Write, Deny) |
NAS web UI |
Windows ACL |
Samba |
13 (NTFS permissions) |
Windows File Explorer |
Both |
FTP, AFP, File Station, Samba |
Please see the application note (https://www.qnap.com/i/en/trade_teach/con_show.php?op=showone&cid=6) for more details. |
Windows File Explorer |
Advanced Folder Permissions
Use "Advanced Folder Permissions" to directly configure subfolder permissions on the NAS. There is no depth limitation for subfolder permission, but it is highly recommended to only change permissions on the first or second subfolder level. When "Advanced Folder Permissions" is enabled, click "Folder Permissions" under the "Shared Folders" tab to configure subfolder permission settings. See Shared Folders" > "Folder Permission of this section for details.
Windows ACL
Use "Windows ACL" to configure the subfolder and file level permissions from Windows File Explorer. All Windows Permissions are supported. For detailed Windows ACL behavior, please refer to standard NTFS permissions: http://www.ntfs.com/ntfs-permissions.htm
| • | To assign subfolder and file permissions to a user or a user group, full control share-level permissions must be granted to the user or user group. |
| • | When Windows ACL is enabled when "Advanced Folder Permissions" is disabled, subfolder and file permissions will only have effect when accessing the NAS from Windows File Explorer. Users connecting to the NAS via FTP, AFP, or File Station will only have share-level permissions. |
| • | When Windows ACL and Advanced Folder Permissions are both enabled, users cannot configure Advanced Folder Permissions from the NAS. Permissions (Read only, Read/Write, and Deny) of Advanced Folder Permissions for AFP, File Station, and FTP will automatically follow Windows ACL configuration. |
Note: Only the "List Folders" / "Read Data" and "Create Files" / "Write Data" permissions will be available when using other file protocols (such as AFP, NFS, FTP, WebDAV, etc) |
|
© 2017 QNAP Systems, Inc. |
|