|
iSCSI Storage |

|

|
|
|
|
iSCSI Storage |

|

|
|
iSCSI Storage
|
iSCSI Storage |
|
|
|
|
|
iSCSI Storage |
|
|
|
The NAS supports a built-in iSCSI (Internet Small Computer System Interface) service for server clustering and virtualized environments.
Users can enable or disable the iSCSI service, change the port of the iSCSI portal, enable/disable the iSNS service, and list and manage all iSCSI targets and LUNs on this page. The NAS supports multiple iSCSI targets and multiple LUNs per target. iSCSI LUNs can be mapped or unmapped to a specific target. In this chapter, these topics are covered:
Note: The function or its content is only applicable on some models. To check for applicable models, please refer to the product comparison table on the QNAP website. |
The NAS supports the built-in iSCSI service. To use this function, follow the steps below:
| 1. | Install an iSCSI initiator on the computer (Windows PC, Mac, or Linux). |
| 2. | Create an iSCSI target on the NAS. |
| 3. | Run the iSCSI initiator and connect to the iSCSI target on the NAS. |
| 4. | After successful logon, format the iSCSI target (disk volume). The disk volume on the NAS can then be used as a virtual drive for the computer. |
Between the computer and the storage device, the computer is called an initiator because it initiates the connection to the device, and the storage device is referred to as a target. An iSCSI LUN is a logical volume mapped to the iSCSI target and there are two types of LUNs: file-based LUN and block-based LUN. File-based LUN is the legacy LUN, while block-based LUN is available for certain NAS models. Please refer to the product comparison table for details.
The table below lists the features supported by block-based LUNs and file-based LUNs:
|
Block-based LUN (recommended) |
File-based LUN (Legacy) |
VAAI Full Copy |
Supported |
Supported |
VAAI Block Zeroing |
Supported |
Supported |
VAAI Hardware Assisted Locking |
Supported |
Supported |
VAAI Thin Provisioning and Space Reclaim |
Supported |
Not Supported |
Thin Provisioning |
Supported |
Supported |
Space Reclamation |
Supported (With VAAI or from Windows Server 2012, Windows 8 or later versions) |
Not Supported |
Microsoft ODX |
Supported |
Not Supported |
LUN Backup |
Supported |
Supported |
LUN Snapshot |
Supported |
1 Time Snapshot (With LUN Backup) |
Please note that in general, better system performance can be achieved through block-based LUNs, thus it is recommended to use block-based LUNs whenever possible.
There are two methods a LUN can be allocated: Thin Provisioning and Instant Allocation:
| • | Thin Provisioning: Allocate the disk space in a flexible manner. The disk space can be allocated to the target anytime regardless of the current storage capacity available on the NAS. Over-allocation is allowed as the storage capacity of the NAS can be expanded using online RAID capacity expansion. |
| • | Instant Allocation: Allocate the disk space to the LUN instantly. This option guarantees the disk space assigned to the LUN but may require more time to create the LUN. |
A maximum of 256 iSCSI targets and LUNs can be created. For example, if you create 100 targets on the NAS, the maximum number of LUNs you can create is 156. Multiple LUNs can be created for each target. However, the maximum number of concurrent connections to the iSCSI targets supported by the NAS varies depending on network infrastructure and application performance. Excessive concurrent connections may impact NAS performance.
Note:
|
iSCSI Quick Configuration Wizard
Follow the steps below to configure the iSCSI target service on the NAS.
| 1. | If no iSCSI targets have been created yet, the Quick Configuration Wizard will automatically be launched and prompt users to create iSCSI targets and LUNs. |
| 2. | Select "iSCSI Target with a mapped LUN" (more on "iSCSI target only" and "iSCSI LUN only" in the following sections) and click "Next". |
| 3. | Click "Next." |
| 4. | Enter the target name and alias. |
| 5. | Only use "Enable clustering access to the iSCSI target from multiple initiators" for cluster-aware file systems such as VMware Virtual Machine File System. The "Data Digest" and "Header Digest" are optional fields (expand on "CRC/Checksum") and are the parameters for which the iSCSI initiator is verified when it attempts to connect to the iSCSI target. Click "Next." |
| 6. | Enter the CHAP authentication settings and click "Next". Check "Use CHAP authentication" and only the initiator will be authenticated by the iSCSI target, and users of the initiators are required to enter the username and password specified here to access the target. Check "Mutual CHAP" for two-way authentication between the iSCSI target and the initiator. The target authenticates the initiator using the first set of username and password. The initiator authenticates the target using the "Mutual CHAP" settings. For username and password limitation on both fields, refer to the following: |
| o | Use CHAP authentication: |
| ▪ | Username limitation: The only valid characters are 0-9, a-z, A-Z and the maximum length is 128 characters. |
| ▪ | Password limitation: The only valid characters are 0-9, a-z, A-Z and the maximum length: 12-16 characters |
| o | Mutual CHAP: |
| ▪ | Username limitation: The only valid characters are 0-9, a-z, A-Z, : (colon), . (dot), and - (dash) and the maximum length: 12-16 characters |
| ▪ | Password limitation: The only valid characters are 0-9, a-z, A-Z, : (colon), . (dot), and - (dash) and the maximum length: 12-16 characters |
| 7. | Choose the LUN type and LUN allocation method, enter the name of the LUN and specify the LUN location (disk volume on the NAS), the capacity and alert threshold for the LUN. Click "Next". |
| 8. | Confirm the settings and click "Next". |
| 9. | Click "Finish". |
| 10. | The target and LUN will both show up on the list. |
Creating iSCSI targets
Follow the steps below to create an iSCSI target:
| 1. | Click "Create". |
| 2. | Select "iSCSI Target only" and click "Next". |
| 3. | Only use "Enable clustering access to the iSCSI target from multiple initiators" for cluster-aware file systems such as VMware Virtual Machine File System. |
| 4. | Enter the target name and alias. Choose to click "CRC/Checksum" to select "Data Digest" and/or "Header Digest". Then Click "Next". |
| 5. | Enter the username and password for "Use CHAP authentication" and/or "Mutual CHAP" and click "Next". Check "Use CHAP authentication" and only the initiator is authenticated by the iSCSI target, and users of the initiators are required to enter the username and password specified here to access the target. Check "Mutual CHAP" for two-way authentication between the iSCSI target and the initiator. The target authenticates the initiator using the first set of username and password. The initiator authenticates the target using the "Mutual CHAP" settings. |
| 6. | Click "Next". |
| 7. | Click "Finish". |
| 8. | A new target will be created. |
Follow the steps below to create a LUN for an iSCSI target:
| 1. | Click "Create". |
| 2. | Select "iSCSI LUN only" and click "Next". |
| 3. | Choose the LUN type and LUN allocation method, enter the name of the LUN and specify the LUN location (disk volume on the NAS), the capacity and alert threshold for the LUN. Click "Next". |
| 4. | Select a target to map and click "Next". |
| 5. | Confirm the settings and click "Next". |
| 6. | Click "Finish". |
| 7. | A LUN will be created and mapped to a target as specified in Step 4. |
To create an un-mapped iSCSI LUN, select "Do not map it to a target for now" in Step 4.
The un-mapped LUN will be created and listed under the un-mapped iSCSI LUN list.
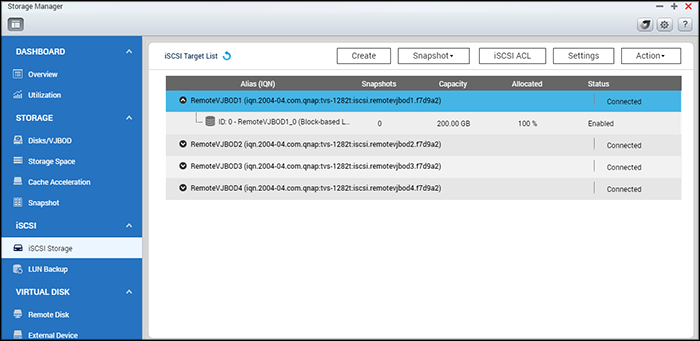
The description of each iSCSI target and LUN status is explained in the table below:
Item |
Status |
Description |
iSCSI target |
Ready |
The iSCSI target is ready but no initiator has connected to it yet. |
Connected |
The iSCSI target has been connected by an initiator. |
|
Disconnected |
The iSCSI target has been disconnected. |
|
Offline |
The iSCSI target has been deactivated and cannot be connected by the initiator. |
|
LUN |
Enabled |
The LUN is active for connection and is visible to authenticated initiators. |
Disabled |
The LUN is inactive and is invisible to the initiators. |
Refer to the table below for actions (the "Action" button) available to manage iSCSI targets and LUNs:
Action |
Description |
Deactivate |
Deactivate a ready or connected target. Note that the connection from the initiators will be removed. |
Activate |
Activate an offline target. |
Modify |
Modify the target settings: target alias, CHAP information, and checksum settings. Modify the LUN settings: LUN allocation, name, disk volume directory, etc. |
Delete |
Delete an iSCSI target. All the connections will be removed. |
Disable |
Disable a LUN. All the connections will be removed. |
Enable |
Enable a LUN. |
Un-map |
Un-map the LUN from the target. Note that a LUN must first be disabled before it can be un-mapped. When clicking this button, the LUN will be moved to the un-mapped iSCSI LUN list. |
Map |
Map the LUN to an iSCSI target. This option is only available on the un-mapped iSCSI LUN list. |
View Connections |
View the connection status of an iSCSI target. |
Note: Some of the above options are not available if the iSCSI target is connected. |
Switching iSCSI LUNs between targets
Follow the steps below to switch an iSCSI LUN between targets:
| 1. | Select an iSCSI LUN to un-map from its iSCSI target. |
| 2. | Click "Action" > "Disable". |
| 3. | Click "OK". |
| 4. | Click "Action" > "Un-map" to un-map the LUN. The LUN will appear on the un-mapped iSCSI LUN list. |
| 5. | Select the un-mapped iSCSI LUN. |
| 6. | Click "Action" > "Map" to map the LUN to another target. |
| 7. | Select the target to map the LUN and click "Apply". |
| 8. | The LUN will be mapped to the target. |
After creating the iSCSI targets and LUN on the NAS, the iSCSI initiator installed on the computer (Windows PC, Mac, or Linux) can be used to connect to the iSCSI target and LUN and the disk volumes can be used as the virtual drives on the computer.
Expanding iSCSI LUN capacity
The NAS supports capacity expansion for iSCSI LUNs. To do so, follow the steps below:
| 1. | Locate an iSCSI LUN on the iSCSI target list. |
| 2. | Click "Action" > "Modify". |
| 3. | Specify the capacity of the LUN. Note that the LUN capacity can be increased several times up to the maximum limit but cannot be decreased. |
| 4. | Click "Apply" to save the settings. |
Note: For the type of LUN allocation, the maximum LUN capacity for both thin provisioning and instant allocation is 144TB or 250TB if the NAS has more than 4GB RAM. |
In environments that require high performance storage (virtualization, etc) users are recommended optimize the iSCSI and NAS hard disks performance in the following ways:
| • | Use instant allocation: When creating an iSCSI LUN, select "Instant Allocation" to achieve slightly higher iSCSI performance. However, the benefits of thin provisioning will be lost. |
| • | Create multiple LUNs: Create multiple LUNs according to the number of processors on the NAS (this can be found in "System Status" > "Resource Monitor"). If the NAS has four processors, it is recommended to create four or more LUNs to optimize iSCSI performance. |
| • | Use different LUNs for heavy load applications: Spread applications such as databases and virtual machines that need high read/write performance to different LUNs. For example, if there are two virtual machines which intensively read and write data on LUNs, it is recommended to create two LUNs so that the VM workloads can be efficiently distributed. |
With the iSCSI advanced access control list (ACL), LUN masking policies can be configured for each connected initiator. If the connected initiator is not on the list, the "Default" policy will be applied to that initiator.
Note: This function or its content is only applicable to some models. To check for applicable models, please refer to the product comparison table on the QNAP website. |
To use this feature, click "Add a Policy". Enter the policy name and the initiator IQN, assign the access right for each LUN created on the NAS and click "Apply".
For descriptions on each field, refer to the table below:
Field |
Description |
Read-only |
The connected initiator can only read the data from the LUN. |
Read/Write |
The connected initiator has read and write access rights to the LUN. |
Deny Access |
The LUN is invisible to the connected initiator. |
If no LUN masking policy is specified for a connected iSCSI initiator, the default policy will be applied. The system default policy allows read and write access from all the connected iSCSI initiators. Click the default policy and "Edit" to edit the default policy. To delete a policy, select a policy and click "Delete".
Note: Make sure at least one LUN has been created on the NAS before editing the default LUN policy. |
Hint: How do I find the initiator IQN? Start the Microsoft iSCSI initiator and click "General". You can then find the IQN of the initiator. |
QNAP Snapshot can be used with iSCSI LUNs and volumes in a QNAP NAS to achieve full protection. With the QNAP Snapshot Agent, the NAS provides application-consistent snapshots by capturing all data in memory and all transactions in process before performing the snapshot. The application will then be consistent and include all necessary data. In case of snapshot restoration, no data will be missing.
On this page, you can take, manage, or restore application (or crash consistent) snapshots on block-based LUNs or check a list of servers with Snapshot Agent installed and set up remote snapshot replication jobs.
Note:
|
Taking a Snapshot
After reserved space is set, you can take snapshots. To create a snapshot, follow these steps:
| 1. | Select a LUN from the list and click "Snapshot" > "Take a Snapshot". |
| 2. | Specify the snapshot name and duration to retain the snapshot. |
| 3. | Select between Crash-consistent or application-consistent snapshot types. |
| 4. | Click "OK". |
Note: Application-consistent snapshots capture all of the data from both volatile (RAM) and persistent storage (hard drives). Crash-consistent snapshots only capture the data from persistent storage. When restoring an application-consistent snapshot for a VM, all of the data (including data stored in volatile storage) will be restored. When restoring a crash-consistent snapshot, only data stored in the persistent storage will be restored.
|
Managing Snapshots
You can revert, delete, and clone a snapshot, set up snapshot schedules, or restore snapshot files for LUNs or volumes. For more information on these functions, see Managing Snapshots with Snapshot Manager for volumes and LUNs.
Snapshot Agent
QNAP Snapshot Agent supports VMware vCenter and Microsoft Volume Shadow Copy Service (VSS). Before taking snapshots from the NAS, the Snapshot Agent notifies vCenter or Microsoft Server to create VMware snapshots for each virtual machine and store those VMware snapshots to iSCSI LUNs (or to flush all the data into the iSCSI LUN,) thereby ensuring application consistent snapshots.
To check connected servers with Snapshot Agent installed, click "Snapshot" > "SnapAgent". On the SnapAgent page, you can check the agent IP, agent version, OS, LUN information, and status. Check www.qnap.com for details on Snapshot Agent.
|
© 2017 QNAP Systems, Inc. |
|